
In one of my earlier posts I described the pre-requisites before you import Main accounts. You can find it here Post#4: DIEF – Importing Main Accounts
Now we will go into the exact steps necessary for a simple DIEF upload.
The concept for import is simple:
- Need to create an import file (template) with data
- Import Data into Staging
- Validate data in Staging
- Import from Staging into Target (AX)
The first step is to go into the “Data Import Export Framework” and create a processing group.

Select the built in “Main account” entity and the type of source data format you require.
If you cannot find the entity “Main account” then please check the below blog post link first.
Post#25: Missing DIEF Main Account Entity
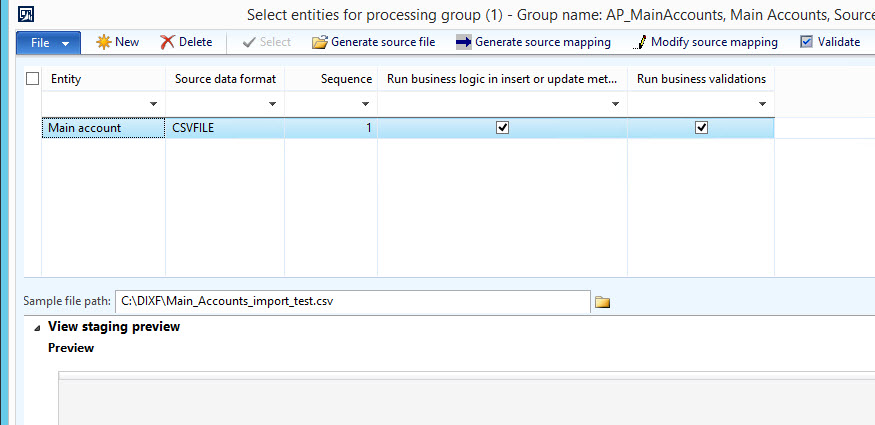
If you dont know the exact fields you can always click on the “Generate Source File” option and choose the fields you require. Of course whatever is mandatory you need to provide and cannot uncheck. You can click on the “Generate sample file” to create the file which you can then use to fill in the column data.

In my file i have the following fields:

After attaching the file in the “sample file path” select the generate source mapping and select yes to generate the mapping from scratch. The system does an exact match based on the name.

If you want to see the mapping in more detail you can click on the modify source mapping.
Then click on validate. If you get an error here check the mapping. You can manually move the lines to match the correct column names if they do not match.
You may optionally preview the source file.
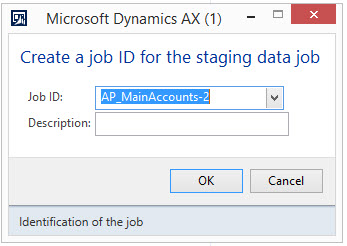
Now that the selection of the source file, fields and mapping is done we need to go back to the processing group screen where we first started. Then click on the “Get staging data”

Click on Ok.
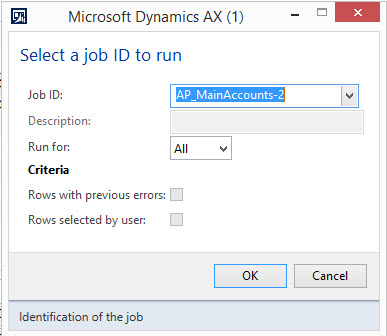
Now click on Run this will read the source file and upload the data into the staging table
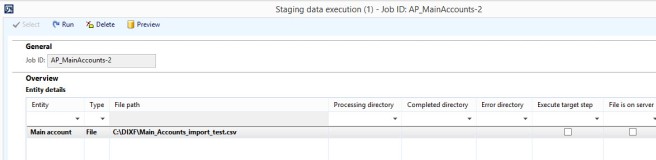
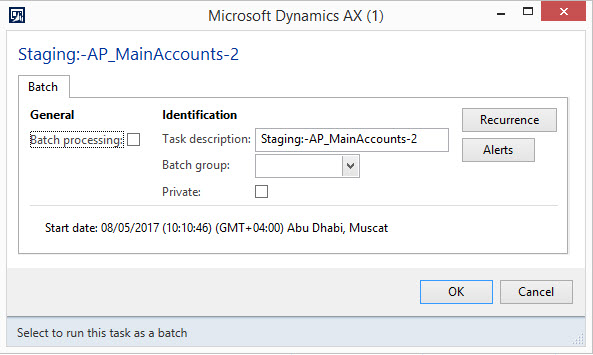
Click the OK button on the next screen to run immediately or if you want as a batch you can click on batch processing. Usually I use batch only for staging to target when there is a lot of data as you can split the data to different chunks which is supposed to be less time for imports.
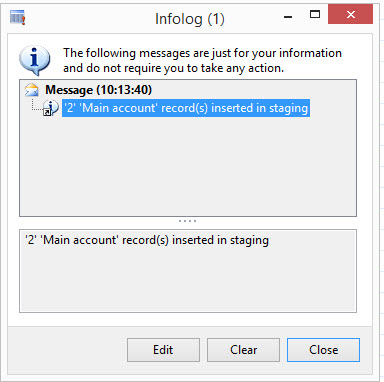
You should see the infolog stating that you completed a successful import. If not successful check the error logs on the “Execution history” button.
Now we need to view the staging records for this click on the “Execution history” button.
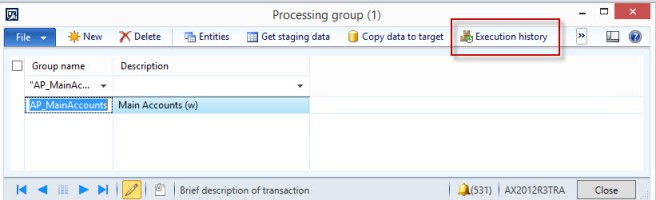
Here you can see the number of times you ran a job for processing group. The last number is the latest. It also shows you what the status is of the Staging/Target.

As you can probably tell the system is telling us that the last job i ran for this processing group has data in staging (since staging status is Ended) and we have not yet pushed it to the Target (AX). Now click on the view staging data so that we can check the data that was imported.
Now click on the a line and click validate or if you want to valid all lines use the validate all button.

Once you use validate depending on the type you should get an infolog with a message stating whether validation has been completed successfully or not. If there are issues you can edit some of the records in the staging table and try validating again. Or just change the import file and re-import it will automatically clear the existing records in the staging table.

Now close the screen and go back to the “Execution History” screen, now click on the “copy data to target” this will move the staging data into live AX.

Now click ok.
Now click on the Run button to run the job to push the data to target AX.
If you have a large number of transactions i recommend increasing the number of tasks so that the bundles come more manageable and faster while uploading.

If everything goes correctly you should get a message stating your new records have been created.

Now as a final verification go to the “General Ledger–>common–>Main accounts” to check if our import actually worked.

That is it folks. Keep on DAXing.

One thought on “Post#9: DIEF – Importing Main Accounts Part 2”